


Last updated: 20 August 2026
Drying curls with a diffuser comes down to three things: distance, patience and touching your hair as little as possible. Hold the dryer too close to your head or run your hands through your hair, and it will frizz despite the attachment. Below is the full sequence, from squeezed-out hair to the cool setting, with the settings to choose, how long to spend on each section and the mistakes that cost the most curl definition, meaning the sharpness and bounce of your curl.
A diffuser is an attachment with prongs that clicks onto your hair dryer. Where a regular nozzle pushes the air out in a single jet, the diffuser breaks that jet and spreads it over a larger surface. Your curl gets dried without being blown apart, and that preserves its shape.
At a glance
- Squeeze the water out of your hair with a microfiber towel and apply your products to damp hair; rubbing is a major cause of frizz.
- Dry at a distance of 10 to 20 centimeters first, until your hair feels damp everywhere, and only then place sections into the prongs.
- Hold the diffuser still for 15 to 20 seconds per section and switch the dryer off before moving to the next one.
- Choose lukewarm air and the lowest airflow, finish with the cool setting and keep your hands off your hair until it is completely dry.
- Expect roughly 10 to 20 minutes, depending on your hair length and above all its thickness.
Contents
- What a diffuser does to your curls
- What you need
- Curls with a diffuser: the step-by-step plan
- How long does drying with a diffuser take?
- Which setting do you use when diffusing?
- Diffusing by hair type
- Six mistakes that make your curls frizz anyway
- What a diffuser does not do
- Frequently asked questions
- In short
What a diffuser does to your curls
The softer airflow leaves your curl pattern alone, so the curl keeps its shape. The heat is spread over a larger surface, which means less heat lands on any one spot. And the prongs lift your hair at the roots, the hair right at your scalp, which adds volume. How long your result stays looking good also depends on your hair itself; we come back to that at the bottom.
Want to know first why a diffuser softens the airflow and which hair that difference matters for? We explain that in a separate article. Below, it is purely about the technique.
What you need
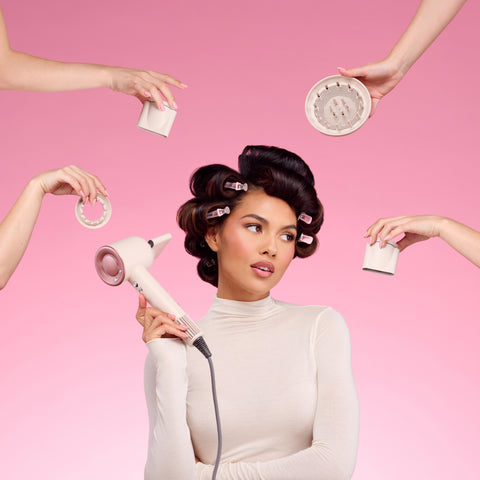
- A hair dryer with separate temperature and speed settings. Without that separation you cannot turn the airflow down while keeping the heat usable. Our PrecisionAir Diffuser Hair Dryer has three heat settings and three speed settings you adjust independently, with a cool shot to finish, and the diffuser is included.
- A diffuser with long prongs that fits your dryer. Short prongs barely lift your hair and give little volume.
- A microfiber towel or an old cotton T-shirt to squeeze the water out.
- A leave-in conditioner, curl cream or gel, plus a heat protectant.
- A clip or pin to keep your top layer out of the way while you work underneath.
Curls with a diffuser: the step-by-step plan
Step 1: Squeeze the water out of your hair instead of rubbing it dry
Take your hair a handful at a time in a microfiber towel and squeeze the water out, from the ends towards the roots. Rubbing opens up the outer layer of your hair, and that is a major cause of frizz. Your hair should be damp, not dripping.
Step 2: Apply your products to damp hair
Distribute your heat protectant and then your leave-in, cream or gel through damp hair. Product spreads much more evenly on wet hair than on half-dry hair, and you need less of it. The American Academy of Dermatology advises a protective product before you start working with heat. Then scrunch your curls upwards a few times, so the pattern starts forming already.
Step 3: Set your settings before you switch the dryer on
Choose a low to medium temperature and the lowest airflow. Get your settings right before you start, so you do not have to fumble halfway through. Which setting suits your hair is covered further down under the settings.
Step 4: Dry at a distance of 10 to 20 centimeters first
Keep the diffuser at a distance and move it calmly around your head, without touching your hair. Test-Aankoop advises, when drying without a brush, to keep the dryer 10 to 20 centimeters from your hair. Keep going until your hair feels damp everywhere instead of wet and no longer drips anywhere. In this phase your product sets into a light cast, and that cast will help hold your curl in place later.
Step 5: Place your curls into the prongs and work section by section
Place a section into the prongs, bring the diffuser up towards your scalp and hold it there, still, for 15 to 20 seconds. Switch the dryer off before moving to the next section, because the burst of air released as you pull it away blows your freshly dried curl loose again. Work your head in parts: first one side, then the other side and finally the nape of your neck. Your nape dries slowest, so you can stay there a little longer.
Step 6: Lift your roots with your head tipped forward
Tip your head forward and bring the diffuser right up to your scalp. Test-Aankoop mentions this as a way to give the roots of your hair more volume, and advises not to twist the diffuser while doing it. So hold it still in each spot and take half a minute per side. This is where the volume comes from that you miss with a regular nozzle.
Step 7: Finish with the cool setting and leave your hair alone
Set the final round to cold. Cool air lets the hair cool down in the shape it has just taken on, which makes the curl hold up more firmly. After that, do not run anything through your hair until it is completely dry. If gel or cream has left a hard cast on your curls, only scrunch it out gently once your hair is fully dry. Then the cast disappears and the shape stays.
How long does drying with a diffuser take?
Expect about a minute per part in the first round and after that 15 to 20 seconds per section. In practice that comes to roughly 10 to 20 minutes, depending on your hair length and above all on its thickness: thick hair needs more parts and more rounds. The first few times it feels slower than regular blow-drying, because you are standing still where you would normally move. What you gain sits mostly in what you no longer have to fix afterwards.
Which setting do you use when diffusing?
Distance does more for your hair than the button. In laboratory research on hair samples, published in Annals of Dermatology, a dryer at 15 centimeters for 60 seconds came out at 47 °C, while 5 centimeters for 15 seconds produced 95 °C. The higher that temperature, the more damage to the outer layer of the hair. The study even suggests that blow-drying at 15 centimeters with a moving dryer causes less damage on balance than letting hair air-dry, despite more damage to the outer layer. That involved a regular dryer without an attachment. With a diffuser the air is already spread, and Test-Aankoop advises letting the sections dry calmly without twisting the diffuser.
For curls, and for fine, colored or damaged hair, lukewarm air is the safe choice. Keep your airflow low, because force moves your curl and movement is what causes frizz. Also be aware that settings vary a lot between devices: the Dutch consumer organisation Consumentenbond measures big differences in temperature and air speed between models in its hair dryer test, so setting 1 on one dryer is not the same as setting 1 on another. With a new device, feel on your hand first what comes out.
Diffusing by hair type
| Hair type | What you do differently | What to watch for |
|---|---|---|
| Fine hair and waves | Less product, low temperature, work mainly at the roots | Too much cream makes the wave go limp |
| Thick hair | More parts, longer per part, head tipped forward | The bottom layer at your nape dries last |
| Strong curls | Dry longer at a distance before placing a section into the prongs | Touching too early costs curl definition |
| Short hair | Diffuser mainly at the scalp, short sections | Placing sections into the prongs barely works, volume at the roots does |
Fine hair and waves suffer from weight the fastest: keep your product light and work mainly at the roots. Thick hair asks for the opposite, namely more patience and more parts, because otherwise the air only reaches the outer layer.
With short hair the technique changes the most. Placing sections into the prongs is barely possible, so you put the diffuser at your scalp and work across your head in small patches, a few seconds per spot each time. The volume then comes from your roots.
Six mistakes that make your curls frizz anyway
- Running your hands through your hair while drying. Every touch on half-dry hair breaks the pattern and opens up the outer layer. Keep your hands off until it is dry.
- Keeping the dryer sweeping back and forth over your hair. That movement belongs with a regular nozzle, not with a diffuser. Holding still per section gives a calmer result.
- Turning the airflow up because it seems faster. Force moves your curl, and that costs you more time fixing than you save in drying time.
- Leaving the dryer on while switching parts. The air released as you do blows freshly dried sections loose again. Switch it off in between.
- Starting on hair that is too wet, without product. Without a cast to set, your curl collapses while drying. Squeeze out first and apply product.
- Stopping too early. Hair that is still damp sags after drying anyway. Keep going until it truly feels dry, including underneath at your nape.
What a diffuser does not do
The diffuser does not create curl in hair that does not curl on its own. It dries and defines the pattern that is already there, whether that is a light wave or a strong curl. If you want shape in straight hair, you work with a different attachment and a different technique. For that we have a separate guide on creating curls with a hair dryer.
How long your curl definition stays looking good is not something we can promise in days. It depends on your hair structure, on moisture in the air and on the products you use. Fine hair holds a shape for less time than thick hair, and a humid day does more to your curl than any technique. What you gain with good drying technique is a cleaner start and less frizz, not a guarantee. We have separately covered why curls fall flat and what can actually be done about it.
A diffuser also does not repair dry or damaged hair. It prevents new damage from a concentrated jet of hot air being added.
Frequently asked questions
Can I create curls with a diffuser?
No, a diffuser does not create new curl. It dries the wave or curl your hair naturally has and makes that shape more visible and more resilient. If you have straight hair and want curls, you need a technique where you shape the hair yourself while it heats up and cools down.
What is the difference between drying with a diffuser and regular blow-drying?
A regular nozzle bundles the air into a single jet, which dries your hair quickly and pulls it smooth. The diffuser spreads that same air over a larger surface, so the curl is not blown apart. Regular blow-drying is faster, drying with a diffuser preserves the shape and gives less frizz.
Does a diffuser fit on every hair dryer?
Not automatically. The diameter of the opening differs per dryer, so a diffuser only fits if the size matches or if the attachment is sold as universal. On a dryer with its own attachments, the included diffuser clicks on properly, and that usually sits a lot more securely.
How do you use a diffuser on short hair?
With short hair you work mainly at the scalp. Place the diffuser with the prongs against your head, hold it in place for a few seconds and then move to the next patch, until you have covered your whole head. Placing sections into the prongs makes little sense at short lengths.
Can you use a diffuser on straight hair too?
Yes, but for a different purpose. On straight hair you use the diffuser mainly at the roots, for volume and gentle drying without a flat crown. Do not expect curl: the air can support a shape that is already there, but not create a new one.
How often can you dry your curls with a diffuser?
You can do it at every wash, as long as you stay on a low to medium setting and use a protective product. Heat is still heat, so the more often you dry, the more important distance and a low setting become. If you blow-dry often, keep the temperature low instead of shortening the drying time with a hotter setting.
In short
Work at a distance until your hair is mostly dry, only then go to your scalp with the prongs, hold the diffuser still per section and leave your hair alone until it is dry. Low airflow, lukewarm air and a cool finish belong with that. If you are looking for a hair dryer where you can set temperature and speed independently, you will find one in our hair dryer collection.
The PrecisionAir Diffuser Hair Dryer has three heat settings and three speed settings you adjust independently, plus a cool shot for the cold finish, and the diffuser comes included.
2-year warranty
30-day money-back guarantee
Trustpilot 4.7/5
Free shipping NL/BE/DE
View the PrecisionAir Diffuser Hair Dryer


