


Last updated: August 9, 2026 · 7 min read
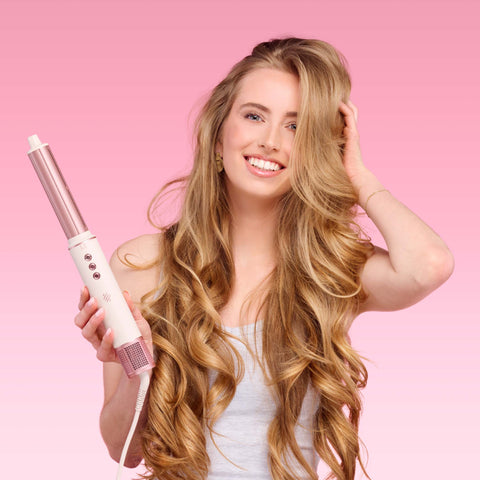
An airstraight is a 2-in-1 styling tool that combines warm airflow with heated plates to dry and style damp hair in one step. Unlike a classic straightener, which works on dry hair at high temperatures, an airstraight uses lower temperatures because the airflow already does much of the work.
In short
- Use an airstraight on towel-dried hair, not dripping wet and not fully dry.
- Always apply a heat protectant spray before you start.
- Divide your hair into 4 to 6 sections for an even result.
- Start on the lowest temperature setting that works for your hair type.
- Work slowly and evenly from root to tip, never force the tool through a knot.
- A full styling session usually takes 10 to 15 minutes, shorter than blow-drying and straightening separately.
Further down, you'll also find the exact steps for using an airstraight and whether the device suits your hair type.
What is an airstraight and how does it work?
An airstraight is a styling tool that combines a directed, warm airflow with heated plates, drying and styling damp hair in a single motion. That's fundamentally different from a traditional straightener, which works only through the heat of the plates themselves and therefore requires your hair to already be dry.
The idea behind an airstraight (also called a “wet-to-dry straightener”) is that the airflow already does much of the styling work before the heat from the plates even comes into play. That lets the tool work at noticeably lower temperatures than a classic straightener, which often needs to be set as high as 200–230°C to smooth dry hair properly.
Some models rely almost entirely on airflow without clamping plates, while others combine airflow with a set of plates that smooth the hair at the same time. Either way, the result is the same: you skip separate blow-drying and go straight from wet to styled hair.
Because the airflow does most of the work, an airstraight is generally gentler on your hair than a straightener used at full temperature on dry hair. That's not a guarantee against heat damage (any heated tool can cause damage if used incorrectly), but it does mean you're applying fewer total heat steps to your hair.
What's the difference between an airstraight and a straightener?
The main difference is when and how you use the tool: an airstraight works on damp hair and dries it at the same time, while a straightener only works on hair that's already fully dry. That difference in approach explains almost all the other differences in the table below.
How do you use an airstraight step by step?
In short: wash your hair, towel-dry it, apply heat protection, divide it into sections, and then work calmly from root to tip at a low to medium temperature. Here are the full steps.
- Wash your hair and towel-dry it with a (micro)fiber towel. Your hair should feel damp, not dripping.
- Apply a heat protection product, this still matters on damp hair once the tool heats up.
- Comb your hair through and divide it into 4 to 6 equal sections with hair clips.
- Choose the lowest setting that works for your hair type and turn on the device.
- Work section by section: take a thin strand, place the tool at the root, and move slowly and evenly toward the ends. Never force it through a knot.
- Repeat each section 1 to 2 times if the hair isn't fully dry and smooth yet.
- Finish with a cool-air setting (if available) to set the style for more shine and longer-lasting hold.
Ace & Taylor's AirStraight Straightener Grey is built specifically with beginners in mind: the wet mode runs between 120–160°C, exactly the lower range you need on damp hair, and sensors correct the temperature up to 30 times per second so you don't accidentally linger too hot on one spot. That makes it easier as a beginner to maintain a safe temperature without constantly having to adjust it yourself.
Does an airstraight work on every hair type?
For most hair types, yes, from fine to thick and from straight to wavy. On very thick or tightly curled hair that you want completely straight, a classic straightener with clamping plates can sometimes give a faster or more thorough result, because it physically presses the hair flat instead of relying mainly on airflow.
An airstraight also isn't the best tool if you actually want to create curls or volume: the device is primarily designed for straightening and smoothing, not for wrapping hair around a barrel.
For everyday use on normal, fine, or lightly wavy hair, an airstraight is often a pleasant choice, precisely because you're done in one step and need the highest temperature settings less often.
What mistakes do beginners make with an airstraight?
The most common mistake is hair that's too wet, or too dry, when you start. Other common mistakes:
- Using the highest temperature setting right away instead of building up from the lowest setting.
- Skipping heat protection because the hair is “already wet anyway”, while the tool still heats the hair up.
- Taking sections that are too large, which makes the result uneven and means you have to repeat more often.
- Moving through the hair too quickly, so the airflow and heat don't get enough time to take effect.
- Forcing the tool through knots instead of detangling first.
Most of these mistakes sort themselves out after a bit of practice, it becomes second nature just like with any new styling tool.
Frequently asked questions
Is an airstraight suitable for beginners?
Yes. The biggest learning curve is keeping the right moisture level in your hair and working calmly in small sections. Once you've got that down, an airstraight is generally easier to use than a classic straightener, because you don't need a separate blow-drying step.
Should my hair be wet or dry for an airstraight?
Towel-dried is ideal: not dripping wet and not already fully dried. Hair that's too wet takes longer to style and can overload the tool, while hair that's too dry removes the benefit of the combined drying-and-styling step.
How long does it take to style your hair with an airstraight?
On average 10 to 15 minutes for the whole head, depending on hair length and thickness. That's usually shorter than blow-drying separately followed by straightening with a separate straightener.
Can I use an airstraight on dry hair too?
With some models, yes, usually via a separate, lower “dry” setting for quick touch-ups in between. For the best result and the least heat exposure, an airstraight is fundamentally designed for use on damp, towel-dried hair.
Ready to try your first airstraight?
The AirStraight Straightener Grey from Ace & Taylor combines airflow with heated plates, so you go from wet to styled hair in one step, with a low wet mode (120–160°C) that matches the temperatures you need as a beginner.
2-year warranty
30-day home trial
Free shipping
Trustpilot 4.7/5
Shop the AirStraight Straightener Grey
A&T
Written by the Ace & Taylor Team, based on how wet-to-dry styling tools work and the questions we get most often from people using an airstraight for the first time.


